Wednesday, 12 November 2014

Melbourne Cup nail art

The Melbourne Cup was just on, so I painted my nails in honour of the Race That Stops The Nation.

On my left hand I did the silks for Admire Rakti, the favourite. I used Essie's Bikini So Teeny and Butler Please, and some nail vinyls from Celestial Cosmetics.


Admire Rakti's silks (from Races)


On my right hand I painted Who Shot Thebarman's silks. I used Kleancolor's Boogie Nights for the orange and Celestial Cosmetic's Snow Clouds for the white dots, which I did using a dotting tool. It was strangely awkward to try and pose my right hand!

Who Shot Thebarman's silks (from Races)


In the end Who Shot Thebarman came third, but Admire Rakti came last and later died of a rare heart condition in his stall just after the race, so that was quite sad.

Monday, 10 November 2014

Portal chamber info icons nail art and Celestial Cosmetics Snow Clouds swatch

As I mentioned earlier, I went to PAX Australia at the beginning of the month, where I cosplayed as Chell from the video game Portal.

I was talking to Caitlin from Nerd With Nails and she mentioned that she'd also gone to PAX, and she'd painted her nails in an Animal Crossing manicure! Check it out, they look amazing.

So here's my PAX mani. In the game, each level starts with a sign that tells you what hazards you'll come across in the level (here's a picture of one). So for my manicure I put the chamber information icons onto my nails! Someone noticed them while admiring my costume and asked to take a picture of my nails as well as my costume - so happy people noticed!

I started by painting my nails white with Celestial Cosmetic's Snow Clouds, a really nice crisp white that goes on very smoothly. I did - I think it was three coats? But you could probably use two careful coats if you wanted. I put a swatch of it at the end of this post.

I then used some nail decals which I'd printed myself, and just stuck them on. This time I let them completely dry before applying topcoat and they hardly smeared - much better. 
 
L-R The cake is a lie, Place weighted cube on button, Use the portal to fling yourself, Sentry turret.

L-R: High-speed portal exit, Use the portal to fling yourself, Aerial faith plate, Sentry turret.

And here's one with my companion cube in the background! :D


To wrap things up, here's Snow Clouds on its own:


Making my blog easier to follow and comment on

I've been working on ways to make my blog easier to follow, and to that end I've signed up to Bloglovin. Hopefully you find it useful!

As I've mentioned, I've also signed up for Instagram (here's a link).

I've also gone into the settings and enabled anonymous comments, so now anyone can comment with ease. :D

Sunday, 9 November 2014

Lit-up jack o' lanterns

I'm a bit behind on my nail blogging because I've been busy making a cosplay costume for Pax, a video game convention. It was heaps of fun but it took a lot of time!

I did make a quick post to my Instagram with the Halloween nails. I painted my nails with Ulta3's midnight and then reverse stamped using Mundo de Uñas polishes, and finally a Chi Chi glow in the dark polish (unnamed yellow) for the eyes of the jack o' lanterns.


Friday, 24 October 2014

Halloween nail art using Born Pretty Store decals and Lilypad Lacquer's polish from the Holo-ween What's In-die Box

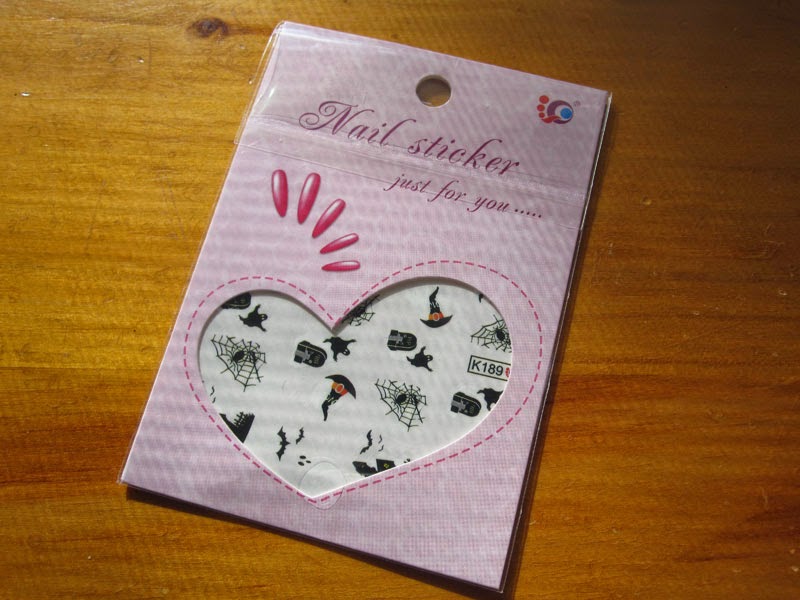
More nail art using polishes from the 2014 October What's In-die Box? holo-ween box. I also used some Halloween nail decals from Born Pretty Store, which were sent to me for review.

(I put them back in the package back-to-front and only realised when I looked at my photos later - oops!)

I love the decals - they're super cute while also having a little Halloween spookiness. You can't see very well in this picture, but the decals are actually multiple colours: black, orange, white, grey and yellow. They really pop on your nails. They're very easy to use (just soak in water until they come away from the backing paper, and then apply to your nails), and they're nice and durable.

You get 20 images, enough for two manicures, which is great! The only downside is that the designs are printed twice - one as a mirror of the other- and for this design, which has some text, you wind up with some mirror text. However if that bothers you, the decals on Born Pretty Store are cheap enough that only doing one manicure with them would be fine, and you could use the remaining decals for accent nails, or combine them with some stamping or other techniques. I just put the mirror image on my thumb and no-one noticed. :D

Reversed writing! Plus my beaten-up tweezers and clean-up brush make a guest appearance.

The only other downside with these decals is that I can't find them on the site at all - I think they may be sold out? So I'm afraid you can't actually buy them! On the other hand, the shipping times from Born Pretty Store mean that you probably wouldn't get them in time for Halloween anyway, unless you paid for express shipping. But there are many other decals which you can get from Born Pretty.

You can also use my coupon code if you place an order (although I believe coupons have been disabled at the moment, due to their big 4th Anniversary Sale) and get 10% off.
Okay, now for the manicure behind the cut!

Monday, 20 October 2014

Peita's Polish from What's In-Die Box October 2014 - Holo-ween

Holo-ween! I love puns, and I love holos, so I knew I had to buy the all-holo What's In-Die Box for October. And what a set of polishes! <3 Because the box only just came out, I've put all pictures of the actual polish under a jump cut.

But first! I recently also received some free products from Born Pretty Store in return for a review, and will be doing a series of manicures using these products and the polishes from the Holo-ween What's In-Die Box. I'm pretty excited for what I have planned! As part of my review, I also got a discount code to share - use code SNBQ10 for 10% off.

For this manicure I used some black and clear/silver rhinestones, which came as part of a two-pack - one box of black and clear/silver rhinestones, and one box of multicoloured rhinestones. They're a great size for nail art, you get a good amount of rhinestones, and I quite like the box - easier to use than a nail wheel, since the compartments snap down and there's no danger of mis-aligning the opening.

The other thing I love is that the box comes with a wax pencil for applying the rhinestones with. IT IS AMAZING. It was such a snap to apply the rhinestones using the wax pencil! A couple of minutes was all it took to do each hand. I got mine bundled with the rhinestones, but you can also buy two wax pencils on their own, (It's called the "Easily Picking Up Rhinestone Picker Wax Pen" on the site, which seems a fair summary of what it's for.)


And now, the manicure! Under a cut to avoid spoilers.

Tuesday, 14 October 2014

Gradient stars

I really wanted to try my hand (so to speak) at another gradient - really pleased with how it turned out! I did multiple coats of the gradient, sponging it three times, and got a much better result.

For this look, I made a gradient using OPI's I Just Can't Copa-cobana, Face of Australia's Some Like It Hot, and Butter London's Pillar Box Red.

I then did some stamping using Lily Allen plate 07, which I'd used in the 31 Day Challenge and loved.

Here's a shot of the gradient - a bit rough without any topcoat:


 And finally, a bonus shot of where I went on holiday this weekend! :) Such lovely weather.

Wednesday, 8 October 2014

DIY water nail decals for the Pittsburgh Penguins - the NHL season begins!

The National Hockey League (which is made up of Canadian and American teams... just go with it) starts up again this week, so I did my nails to celebrate the return of my NHL team, the Pittsburgh Penguins. I painted my nails white and then applied some nail decals which I made myself by printing onto special water decal paper. I bought the paper off eBay but you may be able to find some in craft or hobby shops.

Even being careful with the application of my topcoat, they still smeared a little. Still, they're a great way of doing small intricate designs, like sports team logos, that you don't have a stamp for and can't freehand that detailed.


Saturday, 4 October 2014

31 Day Challenge, Day 3 - Yellow

Day 3! This wraps up the 31 Day Challenge for me, having now gone back and completely every day. I did each challenge on each day. It was tiring but also quite rewarding, and I certainly met my two goals of improving as a blogger and as a nail artist, and interacting more with other nail bloggers.

I've also decided to get an instagram, so you can now find me on instagram here. Same name! :D

For today's manicure. I was inspired by the "song" prompt from earlier (later?) in the challenge, so today's nails are brought to you by the song "Banana Phone".


So catchy! I'm a big ice hockey fan, and when I watch streamed games from the Melbourne Ice, they play this in the intermission. (I'm a fan of the CBR Brave though! And in the NHL, the Pittsburgh Penguins - their first game of the season is on the 8th and I'm pretty excited for it.)

I started by painting my nails with BYS' Sunshine. I wanted to use a different yellow to usual, to mix things up... but I remembered why I don't often use different yellows! This is five coats. I then stamped using Cheeky plates CH42 and CH53. I like the effect, and it's quite eye-catching - three people asked to get a better look at them this afternoon.


And that's a wrap!


Friday, 3 October 2014

31 Day Challenge, Day 2 - Orange

The penultimate day! Exciting. I did some stamping over black with my new mundo de uñas orange polish (!!), using plate Bundle Monster BM-403. I've avoided using this plate because I was worried about getting the images straight, but this is a challenge, so I forged ahead. I'm pleased with how it went.


Thursday, 2 October 2014

31 Day Challenge, Day 1 - Red

Day 1! The theme is red and I'm taking advantage of the open-ended nature of the colour prompts by doing some stamping. A while back I ordered some stamping polish from Mundo De Uñas, and it arrived on Tuesday. I also got a new stamping plate from Lily Anna, and I wanted to try it out.

The Munde de Uñas polish is amazing! So opaque! It does have a rather strong and unusual smell (apparently an enamel paint smell?), but nothing too bad. The main drawback is that, being so opaque, it's a pain to clean up off your cuticles after stamping. In the comments to my water marbling post, Nerd With Nails suggested using chapstick to help with clean up, and I wonder if that would also be worth doing with this stamping polish.

I also love the Lily Anna plate, which gave easy crisp results. After painting my nails with Ciate's Boudoir, a red jelly, I stamped with Lily Anna 07. The star pattern is lovely and I already have plans for some reverse stamping with it.


Wednesday, 1 October 2014

31 Day Challenge, Day 31 - Honour Nails You Love

For today's challenge, I decided to recreate some nails from More Nail Polish. More Nail Polish is one of my favourite nail blogs - amazing manicures (did you see the version of Nolan's Ned Kelly art for the challenge this year? Stunning!), handy swatches and reviews, and she uses a variety of techniques. She's also Australian, which is nice - I enjoy it when bloggers talk about popping down to Bunnings for some acetone rather than, say, Wal-Mart, a store that doesn't exist in Australia. But not only that! She's a fellow Canberran. Even her references to the weather are comfortably familiar.

Back in January, she posted some a manicure titled "Bright yellow reverse stamped flowers", which I loved. Coloured in stamping? It looked great!

From More Nail Polish - http://www.morenailpolish.com/2014/01/bright-yellow-reverse-stamped-flowers.html

To recreate this look, I used the same yellow polish, OPI's I Just Can't Cope-acabana. The white is OPI's Alpine Snow, and I used Bundle Monster's plate BM03 for the flower pattern. The nail studs are from Born Pretty.


So that's the challenge! I missed the first few days though, because I didn't know it was on, so I'll be doing days 1-3 over the next three days. I got my new Mundo de Unas polishes in the mail today (!!) and I'll definitely be using them for the Yellow day - a manicure that has also been inspired by a song. Stay tuned! ;)


Tuesday, 30 September 2014

31 Day Challenge, Day 30 - Owl Be Inspired By A Tutorial

For today I followed a tutorial by Sunshine Citizen for making owls. Super cute! This is actually a tutorial that's probably better suited to short nails, but it's still cute on longer nails.

Sunshine Citizen did a pictorial tutorial and also a video. Here's the picture:
Tutorial by Sunshine Citizen - http://www.sunshinecitizen.com/autumn-owl-nail-art/

For my base colour I chose Ciate's Iced Frappe, a warm brown-grey-mauve colour. Application was pretty good with two coats and good flow onto the nail. I then used white acrylic paint for the face and feathers, because it's so much easier to get solid white that way. (I started with white nail polish - not good.) I finished by doing the eyes/nose/outline in Kleancolor's Dark Brown.


I tried a new hand pose today... pretty satisfied with it, actually. How do you decide how to pose your hands? Do you do the same pose each time? I like to try to vary my poses a bit from post to post and keep things interesting. Also sometimes the manicure can be seen better with a different pose, particularly since my nails have a pretty deep C curve.


Monday, 29 September 2014

31 Day Challenge, Day 29 - Inspired By The Supernatural

A nice quick easy manicure today: blackest night with a ghost accent nail. BooOooo0!

I painted my nails black (Relvon's Black Magic) and then stamped the white ghost on with plate BM-223. I passed over this li'l ghosty for the spooky Halloween nails I did earlier in the challenge because I wanted to keep it black and orange, so this haunting is overdue.


Sunday, 28 September 2014

31 Day Challenge, Day 28 - Inspired By A Flag

This challenge is a bit what? for me... inspired by a flag? I decided to do some freehand bunting, because bunting is nice and festive, and again, freehand practice.

I painted my nails white with Ulta3's Lily White, then used Butter London's Pillar Box Red, Essie's Butler Please (blue), and Face of Australia's Some Like It Hot (orange) for the flags. Ulta3's Midnight for the black rope.

I finished things off with OPI's Matte top coat - omg! So much better than my previous matte topcoat! One coat and done. I like the illustrated look matte coat gives.


31 Day Challenge, Day 27 - Inspired By An Artwork

For this one I tried to imitate a painting by Barnett Newman called Who's Afraid of Red, Yellow and Blue?


Not quite the same scale as the painting! The proportions are not right, alas.

I painted my nails with Butter London's Pillar Box Red, then freehanded the stripes on with Essie's Butler Please and OPI's I Just Can't Cope-acabana. I thought about taping off the lines but wanted to practice freehanding stripes, because I want to get better at it.


Friday, 26 September 2014

31 Day Challenge, Day 26 - Inspired By A Pattern

In a timely delivery, I got some nail mail from Celestial Cosmetics today. I was in desperate need of some new topcoat, as my bottle of HK Girl was down to the dregs, so I went to put in an order and was pleasantly surprised to see that they now sell nail vinyls! I picked up some medium chevrons, and after much deliberation I also got Carina, although there are so many lovely polishes there that it was hard to choose. When my package arrived today I was also delighted to see that I got a mini bottle of the September LE, a "turquoise green linear holographic". Very springlike. :) (If you like the shade, grab it quick! September's nearly over!)

So for the pattern today I busted out my new chevrons, grabbed Carina, and used another Australian indie polish, Picture Polish's Focus. (As an aside, how many great indie polish makers does Australia have? So many! How lucky are we?) Application for all three was excellent. The nail vinyls applied easily to the nail, were easy to reposition and to seal down, were easy to remove - A+ in general.


How good does it look? Ahh I love it!

Thursday, 25 September 2014

31 Day Challenge, Day 25 - Inspired By Fashion: Denim

Denim! Jeans are such a staple of the fashion world, and I was all set up for this challenge. Some time ago I bought Ciate's Denim Manicure kit, and I've been saving it for the right occasion. And not only is the theme for today "fashion", but tomorrow is a casual Friday. Perfect! (I always do my nails in the evening and wear them the next day.)

Ciate also fits the fashion rule in that you pay a premium for the brand name, unless you are like me and wait for it to pop up on Catch Of The Day. :D

The kit comes with a blue polish, Regatta, which quickly dries to a kind of semi-matte finish. It also has some water decal stitches, some nail studs, and some nail glue. Overall the kit was easy to use, with clear instructions, except for the nail glue. It had to be cut open and then had a tendency to go everywhere. I much prefer my other nail glue, which comes in a little bottle with a brush to paint it on. Much easier to control.

This kit was a lot of fun and I like the end result. Check it out!

(Note: the thumb is part of the picture on the packaging, not my own thumb!) 


Wednesday, 24 September 2014

31 Day Challenge, Day 24 - Inspired By A Book, Treasure Island

Today's nails are inspired by the classic book Treasure Island by Robert Louis Stevenson, a tale of pirates and hidden treasure. I really like how these turned out!

I started by painting my nails with Revlon's Gold Coin, then used Cheeky plate CH49 to stamp the treasure chest, the skull and crossbone pattern, the cutlass pattern, and the ships. I stamped the palm tree from N.Nail plate "B26" (available from KKCentreHK, as far as I can tell, because I bought it in-store from a general beauty store). I finished by free-handing the "X marks the spot" and the dotted path to the treasure.


Tuesday, 23 September 2014

31 Day Challenge, Day 23 - Inspired by A Movie, The Little Mermaid

I knew exactly where to turn for this challenge: to Disneyland! More specifically, to the nail polish set I bought when I went to Disneyland last year - the Wickedly Beautiful set. (I note that it's gone up $5 since I bought it, so I feel like I got a retrospective bargain.) Disney has a make-up range called Beautifully Disney, and one of the their nail polish sets is for the "wonderfully wicked ladies", or evil villains. There's Mistress of Evil (Maleficent from Sleeping Beauty), Midnight Hour (from Cinderella), Just One Bite (the Evil Queen from Snow White), and the polish I used, Diva of the Deep for Ursula (from The Little Mermaid).

Diva of the Deep is a lovely dark purple with a warm reddish shimmer through it. Application of the polish was excellent, although it dried with a rather dusty finish - a bit of topcoat fixed that right up.

Since this manicure is all about Ursula, I then stamped tentacles on using Bundle Monster plate BM-401, which is much better etched and was much easier to stamp with. I love Ursula and she certainly owns the stage with her tentacles!


And here are some shots of the whole collection and its packaging. Check out how cute the bottle tops are! They also lined up with the bottle so the image faces you along with the logo - great attention to detail.

L-R:  Midnight Hour, Diva of the Deep, Just One Bite, Mistress of Evil.

L-R: Mistress of Evil, Midnight Hour, Just One Bite, Diva of the Deep.

L-R:   Just One Bite, Midnight Hour, Diva of the Deep, Mistress of Evil.